package com.example.handlingformsubmission;

import org.springframework.stereotype.Controller;
import org.springframework.ui.Model;
import org.springframework.web.bind.annotation.GetMapping;
import org.springframework.web.bind.annotation.ModelAttribute;
import org.springframework.web.bind.annotation.PostMapping;

@Controller
public class GreetingController {

  @GetMapping("/greeting")
  public String greetingForm(Model model) {
    model.addAttribute("greeting", new Greeting());
    return "greeting";
  }

  @PostMapping("/greeting")
  public String greetingSubmit(@ModelAttribute Greeting greeting, Model model) {
    model.addAttribute("greeting", greeting);
    return "result";
  }

}Handling Form Submission
This guide walks you through the process of using Spring to create and submit a web form.
What You Will Build
In this guide, you will build a web form, which will be accessible at the following URL: http://localhost:8080/greeting
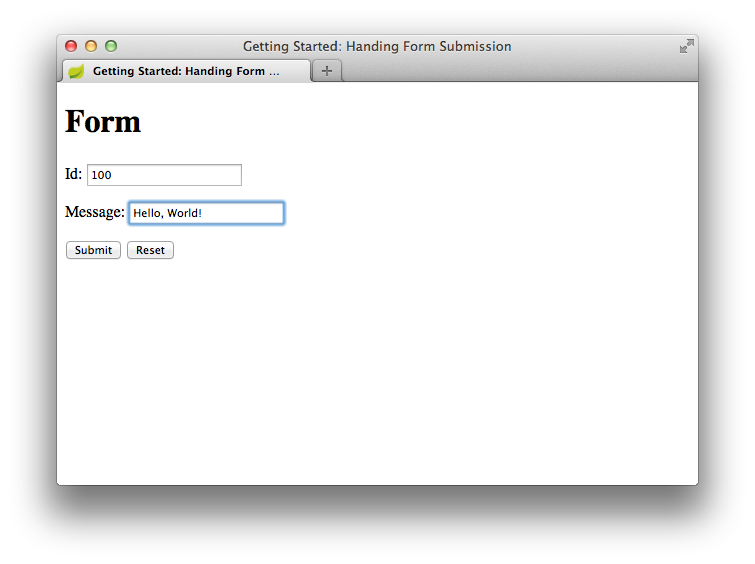
Viewing this page in a browser will display the form. You can submit a greeting by populating the id and content form fields. A results page will be displayed when the form is submitted.
What You Need
-
About 15 minutes
-
A favorite text editor or IDE
-
Java 17 or later
-
You can also import the code straight into your IDE:
How to complete this guide
Like most Spring Getting Started guides, you can start from scratch and complete each step or you can bypass basic setup steps that are already familiar to you. Either way, you end up with working code.
To start from scratch, move on to Starting with Spring Initializr.
To skip the basics, do the following:
-
Download and unzip the source repository for this guide, or clone it using Git:
git clone https://github.com/spring-guides/gs-handling-form-submission.git -
cd into
gs-handling-form-submission/initial -
Jump ahead to Create a Web Controller.
When you finish, you can check your results against the code in gs-handling-form-submission/complete.
Starting with Spring Initializr
You can use this pre-initialized project and click Generate to download a ZIP file. This project is configured to fit the examples in this tutorial.
To manually initialize the project:
-
Navigate to https://start.spring.io. This service pulls in all the dependencies you need for an application and does most of the setup for you.
-
Choose either Gradle or Maven and the language you want to use. This guide assumes that you chose Java.
-
Click Dependencies and select Spring Web and Thymeleaf.
-
Click Generate.
-
Download the resulting ZIP file, which is an archive of a web application that is configured with your choices.
| If your IDE has the Spring Initializr integration, you can complete this process from your IDE. |
| You can also fork the project from Github and open it in your IDE or other editor. |
Create a Web Controller
In Spring’s approach to building web sites, HTTP requests are handled by a controller. These components are easily identified by the @Controller annotation. The GreetingController in the following listing (from src/main/java/com/example/handlingformsubmission/GreetingController.java) handles GET requests for /greeting by returning the name of a View (in this case, greeting). The following View is responsible for rendering the HTML content:
This controller is concise and simple, but a lot is going on. The rest of this section analyzes it step by step.
The mapping annotations let you map HTTP requests to specific controller methods. The two methods in this controller are both mapped to /greeting. You can use @RequestMapping (which, by default, maps all HTTP operations, such as GET, POST, and so forth). However, in this case, the greetingForm() method is specifically mapped to GET by using @GetMapping, while greetingSubmit() is mapped to POST with @PostMapping. This mapping lets the controller differentiate the requests to the /greeting endpoint.
The greetingForm() method uses a Model object to expose a new Greeting to the view template. The Greeting object in the following code (from src/main/java/com/example/handlingformsubmission/Greeting.java) contains fields such as id and content that correspond to the form fields in the greeting view and are used to capture the information from the form:
package com.example.handlingformsubmission;

public class Greeting {

  private long id;
  private String content;

  public long getId() {
    return id;
  }

  public void setId(long id) {
    this.id = id;
  }

  public String getContent() {
    return content;
  }

  public void setContent(String content) {
    this.content = content;
  }

}
The implementation of the method body relies on a view technology to perform server-side rendering of the HTML by converting the view name (greeting) into a template to render. In this case, we use Thymeleaf, which parses the greeting.html template and evaluates the various template expressions to render the form. The following listing (from src/main/resources/templates/greeting.html) shows the greeting template:
<!DOCTYPE HTML>
<html xmlns:th="https://www.thymeleaf.org">
<head>
    <title>Getting Started: Handling Form Submission</title>
    <meta http-equiv="Content-Type" content="text/html; charset=UTF-8" />
</head>
<body>
	<h1>Form</h1>
    <form action="#" th:action="@{/greeting}" th:object="${greeting}" method="post">
    	<p>Id: <input type="text" th:field="*{id}" /></p>
        <p>Message: <input type="text" th:field="*{content}" /></p>
        <p><input type="submit" value="Submit" /> <input type="reset" value="Reset" /></p>
    </form>
</body>
</html>
The th:action="@{/greeting}" expression directs the form to POST to the /greeting endpoint, while the th:object="${greeting}" expression declares the model object to use for collecting the form data. The two form fields, expressed with th:field="*{id}" and th:field="*{content}", correspond to the fields in the Greeting object.
That covers the controller, model, and view for presenting the form. Now we can review the process of submitting the form. As noted earlier, the form submits to the /greeting endpoint by using a POST call. The greetingSubmit() method receives the Greeting object that was populated by the form. The Greeting is a @ModelAttribute, so it is bound to the incoming form content. Also, the submitted data can be rendered in the result view by referring to it by name (by default, the name of the method parameter, so greeting in this case). The id is rendered in the <p th:text="'id: ' + ${greeting.id}" /> expression. Likewise, the content is rendered in the <p th:text="'content: ' + ${greeting.content}" /> expression. The following listing (from src/main/resources/templates/result.html) shows the result template:
<!DOCTYPE HTML>
<html xmlns:th="https://www.thymeleaf.org">
<head>
    <title>Getting Started: Handling Form Submission</title>
    <meta http-equiv="Content-Type" content="text/html; charset=UTF-8" />
</head>
<body>
	<h1>Result</h1>
    <p th:text="'id: ' + ${greeting.id}" />
    <p th:text="'content: ' + ${greeting.content}" />
    <a href="/greeting">Submit another message</a>
</body>
</html>
For clarity, this example uses two separate view templates for rendering the form and displaying the submitted data. However, you can use a single view for both purposes.
Make the Application Executable
Although you can package this service as a traditional WAR file for deployment to an external application server, the simpler approach is to create a standalone application. You package everything in a single, executable JAR file, driven by a good old Java main() method. Along the way, you use Spring’s support for embedding the Tomcat servlet container as the HTTP runtime, instead of deploying to an external instance. The following listing (from src/main/java/com/example/handlingformsubmission/HandlingFormSubmissionApplication.java) shows the application class:
package com.example.handlingformsubmission;

import org.springframework.boot.SpringApplication;
import org.springframework.boot.autoconfigure.SpringBootApplication;

@SpringBootApplication
public class HandlingFormSubmissionApplication {

  public static void main(String[] args) {
    SpringApplication.run(HandlingFormSubmissionApplication.class, args);
  }

}
@SpringBootApplication is a convenience annotation that adds all of the following:
-
@Configuration: Tags the class as a source of bean definitions for the application context. -
@EnableAutoConfiguration: Tells Spring Boot to start adding beans based on classpath settings, other beans, and various property settings. For example, ifspring-webmvcis on the classpath, this annotation flags the application as a web application and activates key behaviors, such as setting up aDispatcherServlet. -
@ComponentScan: Tells Spring to look for other components, configurations, and services in thecom/examplepackage, letting it find the controllers.
The main() method uses Spring Boot’s SpringApplication.run() method to launch an application. Did you notice that there was not a single line of XML? There is no web.xml file, either. This web application is 100% pure Java and you did not have to deal with configuring any plumbing or infrastructure.
Build an executable JAR
You can run the application from the command line with Gradle or Maven. You can also build a single executable JAR file that contains all the necessary dependencies, classes, and resources and run that. Building an executable jar makes it easy to ship, version, and deploy the service as an application throughout the development lifecycle, across different environments, and so forth.
If you use Gradle, you can run the application by using ./gradlew bootRun. Alternatively, you can build the JAR file by using ./gradlew build and then run the JAR file, as follows:
If you use Maven, you can run the application by using ./mvnw spring-boot:run. Alternatively, you can build the JAR file with ./mvnw clean package and then run the JAR file, as follows:
Logging output is displayed. The service should be up and running within a few seconds.
Test the service
Now that the web site is running, visit http://localhost:8080/greeting, where you see the following form:
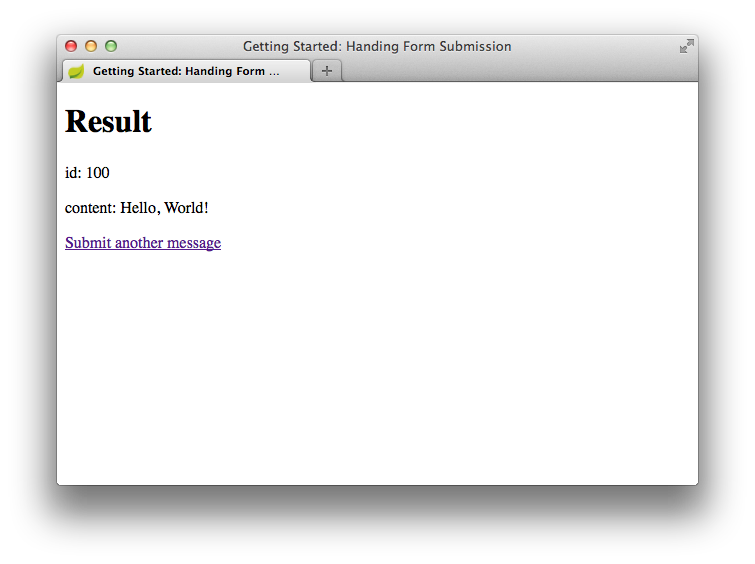
Submit an ID and message to see the results:
Summary
Congratulations! You have just used Spring to create and submit a form.
See Also
The following guides may also be helpful:
Want to write a new guide or contribute to an existing one? Check out our contribution guidelines.
| All guides are released with an ASLv2 license for the code, and an Attribution, NoDerivatives creative commons license for the writing. |