<!DOCTYPE html>
<html xmlns="http://www.w3.org/1999/xhtml" xmlns:th="https://www.thymeleaf.org">
    <head>
        <title>Spring Security Example</title>
    </head>
    <body>
        <h1>Welcome!</h1>

        <p>Click <a th:href="@{/hello}">here</a> to see a greeting.</p>
    </body>
</html>Securing a Web Application
This guide walks you through the process of creating a simple web application with resources that are protected by Spring Security.
What You Will Build
You will build a Spring MVC application that secures the page with a login form that is backed by a fixed list of users.
What You Need
-
About 15 minutes
-
A favorite text editor or IDE
-
Java 17 or later
-
You can also import the code straight into your IDE:
How to complete this guide
Like most Spring Getting Started guides, you can start from scratch and complete each step or you can bypass basic setup steps that are already familiar to you. Either way, you end up with working code.
To start from scratch, move on to Starting with Spring Initializr.
To skip the basics, do the following:
-
Download and unzip the source repository for this guide, or clone it using Git:
git clone https://github.com/spring-guides/gs-securing-web.git -
cd into
gs-securing-web/initial -
Jump ahead to Create an Unsecured Web Application.
When you finish, you can check your results against the code in gs-securing-web/complete.
Starting with Spring Initializr
You can use this pre-initialized project and click Generate to download a ZIP file. This project is configured to fit the examples in this tutorial.
To manually initialize the project:
-
Navigate to https://start.spring.io. This service pulls in all the dependencies you need for an application and does most of the setup for you.
-
Choose either Gradle or Maven and the language you want to use.
-
Click Dependencies and select Spring Web and Thymeleaf.
-
Click Generate.
-
Download the resulting ZIP file, which is an archive of a web application that is configured with your choices.
| If your IDE has the Spring Initializr integration, you can complete this process from your IDE. |
| You can also fork the project from GitHub and open it in your IDE or other editor. |
Create an Unsecured Web Application
Before you can apply security to a web application, you need a web application to secure. This section walks you through creating a simple web application. Then you will secure it with Spring Security in the next section.
The web application includes two simple views: a home page and a “Hello, World” page. The home page is defined in the following Thymeleaf template (from src/main/resources/templates/home.html):
This simple view includes a link to the /hello page, which is defined in the following Thymeleaf template (from src/main/resources/templates/hello.html):
<!DOCTYPE html>
<html xmlns="http://www.w3.org/1999/xhtml" xmlns:th="https://www.thymeleaf.org">
    <head>
        <title>Hello World!</title>
    </head>
    <body>
        <h1>Hello world!</h1>
    </body>
</html>
The web application is based on Spring MVC. As a result, you need to configure Spring MVC and set up view controllers to expose these templates. The following listing shows a class that configures Spring MVC in the application:
Java
package com.example.securingweb;

import org.springframework.context.annotation.Configuration;
import org.springframework.web.servlet.config.annotation.ViewControllerRegistry;
import org.springframework.web.servlet.config.annotation.WebMvcConfigurer;

@Configuration
class MvcConfig implements WebMvcConfigurer {

	@Override
	public void addViewControllers(ViewControllerRegistry registry) {
		registry.addViewController("/home").setViewName("home");
		registry.addViewController("/").setViewName("home");
		registry.addViewController("/hello").setViewName("hello");
		registry.addViewController("/login").setViewName("login");
	}

}
Kotlin
package com.example.securingweb

import org.springframework.context.annotation.Configuration
import org.springframework.web.servlet.config.annotation.ViewControllerRegistry
import org.springframework.web.servlet.config.annotation.WebMvcConfigurer

@Configuration
class MvcConfig : WebMvcConfigurer {
    override fun addViewControllers(registry: ViewControllerRegistry) {
        registry.addViewController("/home").setViewName("home")
        registry.addViewController("/").setViewName("home")
        registry.addViewController("/hello").setViewName("hello")
        registry.addViewController("/login").setViewName("login")
    }
}
The addViewControllers() method (which overrides the method of the same name in WebMvcConfigurer) adds four view controllers. Two of the view controllers reference the view whose name is home (defined in home.html), and another references the view named hello (defined in hello.html). The fourth view controller references another view named login. You will create that view in the next section.
At this point, you could jump ahead to “Run the Application” and run the application without having to log in to anything.
Now that you have an unsecured web application, you can add security to it.
Set up Spring Security
Suppose that you want to prevent unauthorized users from viewing the greeting page at /hello. As it is now, if visitors click the link on the home page, they see the greeting with no barriers to stop them. You need to add a barrier that forces the visitor to sign in before they can see that page.
You do that by configuring Spring Security in the application. If Spring Security is on the classpath, Spring Boot automatically secures all HTTP endpoints with “basic” authentication. However, you can further customize the security settings. The first thing you need to do is add Spring Security to the classpath.
With Gradle, you need to add three lines (one for the application, one for Thymeleaf & Spring Security integration, and one for testing) in the dependencies section of your build.gradle(.kts) file, as the following listing shows:
Groovy (build.gradle)
implementation 'org.springframework.boot:spring-boot-starter-security'
implementation 'org.thymeleaf.extras:thymeleaf-extras-springsecurity6'
testImplementation 'org.springframework.security:spring-security-test'
Kotlin (build.gradle.kts)
implementation("org.springframework.boot:spring-boot-starter-security")
implementation("org.thymeleaf.extras:thymeleaf-extras-springsecurity6")
testImplementation("org.springframework.boot:spring-boot-starter-security-test")
The following listing shows the finished build.gradle(.kts) file:
Groovy (build.gradle)
plugins {
	id 'java'
	id 'org.springframework.boot' version '4.0.7'
	id 'io.spring.dependency-management' version '1.1.7'
}

group = 'com.example'
version = '0.0.1-SNAPSHOT'

java {
	toolchain {
		languageVersion = JavaLanguageVersion.of(17)
	}
}

repositories {
	mavenCentral()
}

dependencies {
	implementation 'org.springframework.boot:spring-boot-starter-webmvc'
	implementation 'org.springframework.boot:spring-boot-starter-thymeleaf'
	implementation 'org.springframework.boot:spring-boot-starter-security'
	implementation 'org.thymeleaf.extras:thymeleaf-extras-springsecurity6'
	testImplementation 'org.springframework.security:spring-security-test'
	testImplementation 'org.springframework.boot:spring-boot-starter-test'
	testImplementation 'org.springframework.boot:spring-boot-starter-security-test'
	testImplementation 'org.springframework.boot:spring-boot-starter-webmvc-test'
}

test {
	useJUnitPlatform()
}
Kotlin (build.gradle.kts)
plugins {
    id("org.springframework.boot") version "4.0.0"
    id("io.spring.dependency-management") version "1.1.7"
    kotlin("jvm") version "2.2.21"
    kotlin("plugin.spring") version "2.2.21"
}

group = "com.example"
version = "0.0.1-SNAPSHOT"

java {
    toolchain {
        languageVersion = JavaLanguageVersion.of(17)
    }
}

repositories {
    mavenCentral()
}

dependencies {
    implementation("org.springframework.boot:spring-boot-starter-webmvc")
    implementation("org.springframework.boot:spring-boot-starter-thymeleaf")
    implementation("org.jetbrains.kotlin:kotlin-reflect")
    implementation("org.springframework.boot:spring-boot-starter-security")
    implementation("org.thymeleaf.extras:thymeleaf-extras-springsecurity6")
    testImplementation("org.springframework.boot:spring-boot-starter-security-test")
    testImplementation("org.springframework.boot:spring-boot-starter-test")
    testImplementation("org.springframework.boot:spring-boot-starter-webmvc-test")
}

kotlin {
    compilerOptions {
        freeCompilerArgs.addAll("-Xjsr305=strict", "-Xannotation-default-target=param-property")
    }
}

tasks.withType<Test> {
    useJUnitPlatform()
}
With Maven, you need to add two extra entries (one for the application and one for testing) to the <dependencies> element in pom.xml, as the following listing shows:
<dependency>
	<groupId>org.springframework.boot</groupId>
	<artifactId>spring-boot-starter-security</artifactId>
</dependency>
<dependency>
	<groupId>org.thymeleaf.extras</groupId>
	<artifactId>thymeleaf-extras-springsecurity6</artifactId>
</dependency>
<dependency>
	<groupId>org.springframework.boot</groupId>
	<artifactId>spring-boot-starter-security-test</artifactId>
	<scope>test</scope>
</dependency>
The following listing shows the finished pom.xml file:
<?xml version="1.0" encoding="UTF-8"?>
<project xmlns="http://maven.apache.org/POM/4.0.0" xmlns:xsi="http://www.w3.org/2001/XMLSchema-instance"
	xsi:schemaLocation="http://maven.apache.org/POM/4.0.0 https://maven.apache.org/xsd/maven-4.0.0.xsd">
	<modelVersion>4.0.0</modelVersion>
	<parent>
		<groupId>org.springframework.boot</groupId>
		<artifactId>spring-boot-starter-parent</artifactId>
		<version>4.0.6</version>
		<relativePath/> <!-- lookup parent from repository -->
	</parent>
	<groupId>com.example</groupId>
	<artifactId>securing-web-complete</artifactId>
	<version>0.0.1-SNAPSHOT</version>

	<properties>
		<java.version>17</java.version>
	</properties>

	<dependencies>
		<dependency>
			<groupId>org.springframework.boot</groupId>
			<artifactId>spring-boot-starter-thymeleaf</artifactId>
		</dependency>
		<dependency>
			<groupId>org.springframework.boot</groupId>
			<artifactId>spring-boot-starter-webmvc</artifactId>
		</dependency>
		<dependency>
			<groupId>org.springframework.boot</groupId>
			<artifactId>spring-boot-starter-security</artifactId>
		</dependency>
		<dependency>
			<groupId>org.thymeleaf.extras</groupId>
			<artifactId>thymeleaf-extras-springsecurity6</artifactId>
		</dependency>
		<dependency>
			<groupId>org.springframework.boot</groupId>
			<artifactId>spring-boot-starter-security-test</artifactId>
			<scope>test</scope>
		</dependency>

		<dependency>
			<groupId>org.springframework.boot</groupId>
			<artifactId>spring-boot-starter-test</artifactId>
			<scope>test</scope>
		</dependency>
		<dependency>
			<groupId>org.springframework.boot</groupId>
			<artifactId>spring-boot-starter-webmvc-test</artifactId>
			<scope>test</scope>
		</dependency>
	</dependencies>

</project>
The following security configuration ensures that only authenticated users can see the secret greeting:
Java
package com.example.securingweb;

import org.springframework.context.annotation.Bean;
import org.springframework.context.annotation.Configuration;
import org.springframework.security.config.annotation.web.builders.HttpSecurity;
import org.springframework.security.config.annotation.web.configuration.EnableWebSecurity;
import org.springframework.security.config.annotation.web.configurers.LogoutConfigurer;
import org.springframework.security.core.userdetails.User;
import org.springframework.security.core.userdetails.UserDetails;
import org.springframework.security.core.userdetails.UserDetailsService;
import org.springframework.security.crypto.bcrypt.BCryptPasswordEncoder;
import org.springframework.security.crypto.password.PasswordEncoder;
import org.springframework.security.provisioning.InMemoryUserDetailsManager;
import org.springframework.security.web.SecurityFilterChain;

@Configuration
@EnableWebSecurity
class WebSecurityConfig {

	@Bean
	SecurityFilterChain securityFilterChain(HttpSecurity http) {
		// @formatter:off
		http
			.authorizeHttpRequests((requests) -> requests
				.requestMatchers("/", "/home").permitAll()
				.anyRequest().authenticated()
			)
			.formLogin((form) -> form
				.loginPage("/login")
				.permitAll()
			)
			.logout(LogoutConfigurer::permitAll);
		// @formatter:on

		return http.build();
	}

	@Bean
	PasswordEncoder passwordEncoder() {
		return new BCryptPasswordEncoder();
	}

	@Bean
	UserDetailsService userDetailsService(PasswordEncoder encoder) {
		String password = encoder.encode("password");
		UserDetails user = User.withUsername("user").password(password).roles("USER").build();
		return new InMemoryUserDetailsManager(user);
	}

}
Kotlin
package com.example.securingweb

import org.springframework.context.annotation.Bean
import org.springframework.context.annotation.Configuration
import org.springframework.security.config.annotation.web.builders.HttpSecurity
import org.springframework.security.config.annotation.web.configuration.EnableWebSecurity
import org.springframework.security.config.annotation.web.invoke
import org.springframework.security.core.userdetails.User
import org.springframework.security.core.userdetails.UserDetailsService
import org.springframework.security.crypto.bcrypt.BCryptPasswordEncoder
import org.springframework.security.crypto.password.PasswordEncoder
import org.springframework.security.provisioning.InMemoryUserDetailsManager
import org.springframework.security.web.SecurityFilterChain

@Configuration
@EnableWebSecurity
class WebSecurityConfig {

    @Bean
    fun securityFilterChain(http: HttpSecurity): SecurityFilterChain {
        http {
            // Kotlin security extensions allow concise DSL instead of builder-style lambdas
            authorizeHttpRequests {
                authorize("/", permitAll)
                authorize("/home", permitAll)
                authorize(anyRequest, authenticated)
            }
            formLogin {
                loginPage = "/login"
                permitAll()
            }
            logout {
                permitAll()
            }
        }

        return http.build()
    }

    @Bean
    fun passwordEncoder(): PasswordEncoder {
        return BCryptPasswordEncoder()
    }

    @Bean
    fun userDetailsService(): UserDetailsService {
        val encoder = BCryptPasswordEncoder()
        val user = User.builder()
            .username("user")
            .password(encoder.encode("password"))
            .roles("USER")
            .build()

        return InMemoryUserDetailsManager(user)
    }
}
The WebSecurityConfig class is annotated with @EnableWebSecurity to enable Spring Security’s web security support and provide the Spring MVC integration. It also exposes two beans to set some specifics for the web security configuration:
The SecurityFilterChain bean defines which URL paths should be secured and which should not. Specifically, the / and /home paths are configured to not require any authentication. All other paths must be authenticated.
When a user successfully logs in, they are redirected to the previously requested page that required authentication. There is a custom /login page (which is specified by loginPage()), and everyone is allowed to view it.
The UserDetailsService bean sets up an in-memory user store with a single user. That user is given a user name of user, a password of password, and a role of USER.
Now you need to create the login page. There is already a view controller for the login view, so you need only to create the login view itself, as the following listing (from src/main/resources/templates/login.html) shows:
<!DOCTYPE html>
<html xmlns="http://www.w3.org/1999/xhtml" xmlns:th="https://www.thymeleaf.org">
    <head>
        <title>Spring Security Example </title>
    </head>
    <body>
        <div th:if="${param.error}">
            Invalid username and password.
        </div>
        <div th:if="${param.logout}">
            You have been logged out.
        </div>
        <form th:action="@{/login}" method="post">
            <div><label> User Name : <input type="text" name="username"/> </label></div>
            <div><label> Password: <input type="password" name="password"/> </label></div>
            <div><input type="submit" value="Sign In"/></div>
        </form>
    </body>
</html>
This Thymeleaf template presents a form that captures a username and password and posts them to /login. As configured, Spring Security provides a filter that intercepts that request and authenticates the user. If the user fails to authenticate, the page is redirected to /login?error, and your page displays the appropriate error message. Upon successfully signing out, your application is sent to /login?logout, and your page displays the appropriate success message.
Last, you need to provide the visitor a way to display the current user name and sign out. To do so, update the hello.html to say hello to the current user and contain a Sign Out form, as the following listing (from src/main/resources/templates/hello.html) shows:
<!DOCTYPE html>
<html xmlns="http://www.w3.org/1999/xhtml" xmlns:th="https://www.thymeleaf.org"
      xmlns:sec="https://www.thymeleaf.org/thymeleaf-extras-springsecurity6">
    <head>
        <title>Hello World!</title>
    </head>
    <body>
        <h1 th:inline="text">Hello <span th:remove="tag" sec:authentication="name">thymeleaf</span>!</h1>
        <form th:action="@{/logout}" method="post">
            <input type="submit" value="Sign Out"/>
        </form>
    </body>
</html>
We display the username by using Thymeleaf’s integration with Spring Security. The “Sign Out” form submits a POST to /logout. Upon successfully logging out, it redirects the user to /login?logout.
Run the Application
The Spring Initializr creates an application class for you. In this case, you need not modify the class. The following listing shows the application class:
Java
package com.example.securingweb;

import org.springframework.boot.SpringApplication;
import org.springframework.boot.autoconfigure.SpringBootApplication;

@SpringBootApplication
class SecuringWebApplication {

	public static void main(String[] args) {
		SpringApplication.run(SecuringWebApplication.class, args);
	}

}
Kotlin
package com.example.securingweb

import org.springframework.boot.autoconfigure.SpringBootApplication
import org.springframework.boot.runApplication

@SpringBootApplication
class SecuringWebApplication

fun main(args: Array<String>) {
    runApplication<SecuringWebApplication>(*args)
}
Build an executable JAR
You can run the application from the command line with Gradle or Maven. You can also build a single executable JAR file that contains all the necessary dependencies, classes, and resources and run that. Building an executable jar makes it easy to ship, version, and deploy the service as an application throughout the development lifecycle, across different environments, and so forth.
If you use Gradle, you can run the application by using ./gradlew bootRun. Alternatively, you can build the JAR file by using ./gradlew build and then run the JAR file, as follows:
If you use Maven, you can run the application by using ./mvnw spring-boot:run. Alternatively, you can build the JAR file with ./mvnw clean package and then run the JAR file, as follows:
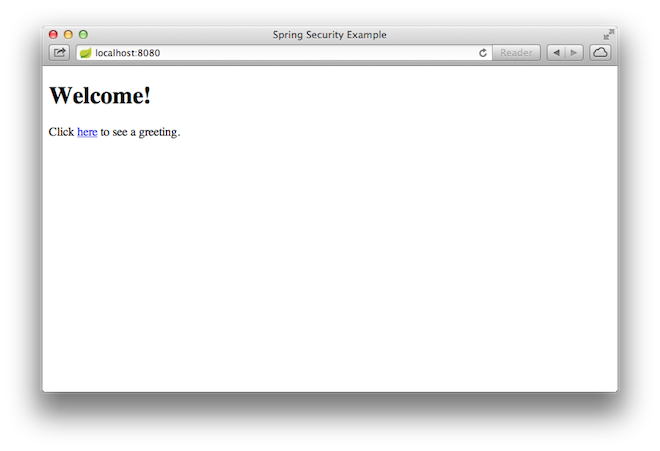
Once the application starts up, point your browser to http://localhost:8080. You should see the home page, as the following image shows:
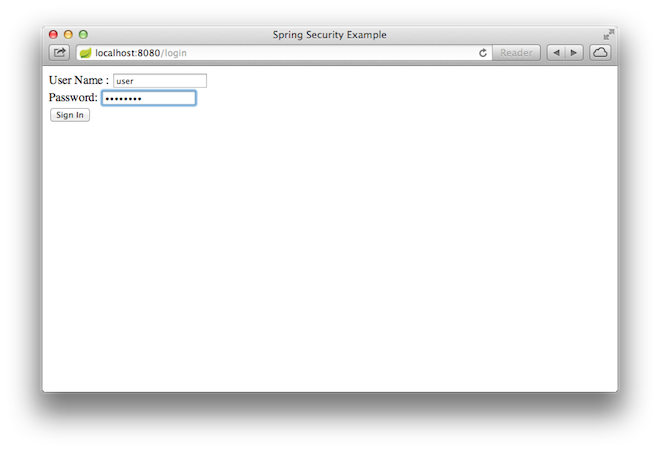
When you click on the link, it attempts to take you to the greeting page at /hello. However, because that page is secured and you have not yet logged in, it takes you to the login page, as the following image shows:
| If you jumped down here with the unsecured version, you do not see the login page. You should back up and write the rest of the security-based code. |
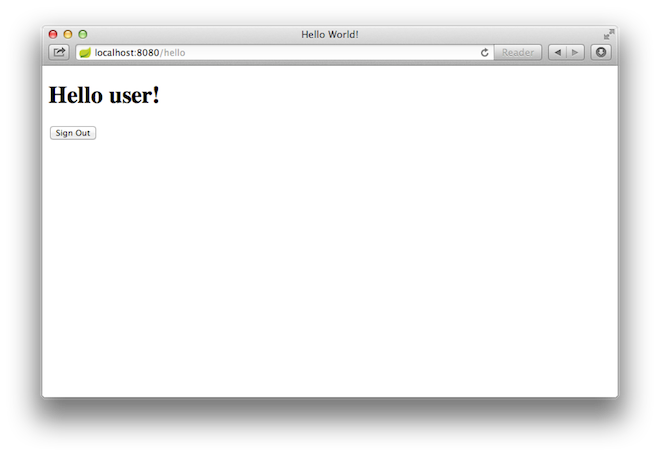
At the login page, sign in as the test user by entering user and password for the username and password fields, respectively. Once you submit the login form, you are authenticated and then taken to the greeting page, as the following image shows:
If you click on the Sign Out button, your authentication is revoked, and you are returned to the login page with a message indicating that you are logged out.
Summary
Congratulations! You have developed a simple web application that is secured with Spring Security.
See Also
The following guides may also be helpful:
Want to write a new guide or contribute to an existing one? Check out our contribution guidelines.
| All guides are released with an ASLv2 license for the code, and an Attribution, NoDerivatives creative commons license for the writing. |