Get ahead
VMware offers training and certification to turbo-charge your progress.
Learn moreIn Spring Android and Maven (Part 1), I described how to build an Android application from the command-line using Maven. In this post, I will show you how to build an Android application with Maven dependency management from the Eclipse IDE. The application will also showcase the latest features in Spring Android 1.0.0.M2, which was released this week.
The Maven Android Plugin lets you build your Android applications with Maven and benefit from dependency management. Google's Android Development Tools (ADT) plugin allows you to develop and build Android applications within the Eclipse IDE. To get Maven dependency management within Eclipse, the Maven Integration for Android Development Tools plugin is required, which integrates m2eclipse, the ADT Plugin, and the Maven Android Plugin. This post will show you how to install this plugin and use it to get Maven-based dependency management working in the Eclipse IDE.
The specific versions of each component used in this post are listed below:
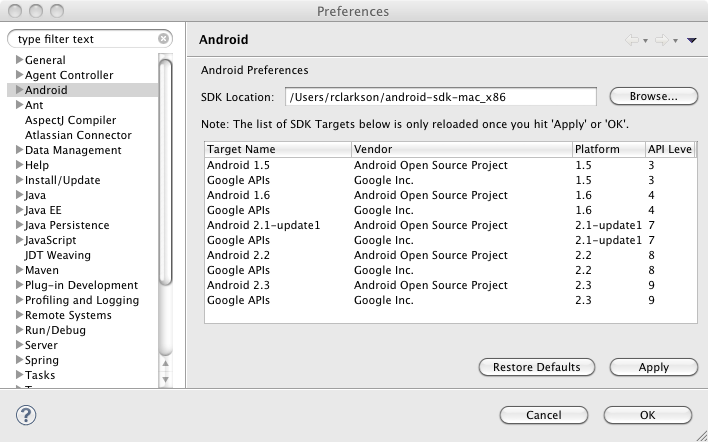
Before building or compiling any code, we need to install and configure the required Eclipse plugins. In <a href="Part 1 I discussed installing the Android SDK, so I will assume you have already done so. However, if you have not, then you will need to install it before continuing. Additionally, you will need to have already installed Eclipse 3.5 or newer. In this example I am using SpringSource Tool Suite 2.5.2 which is based on Eclipse 3.6.1.
There are three Eclipse plugins that need to be installed, the ADT Plugin for Eclipse, Maven Integration for Eclipse, and Maven Integration for Android Development Tools. You have two options for installing these plugins, either by using the Eclipse Marketplace Client, or by manually installing each plugin.
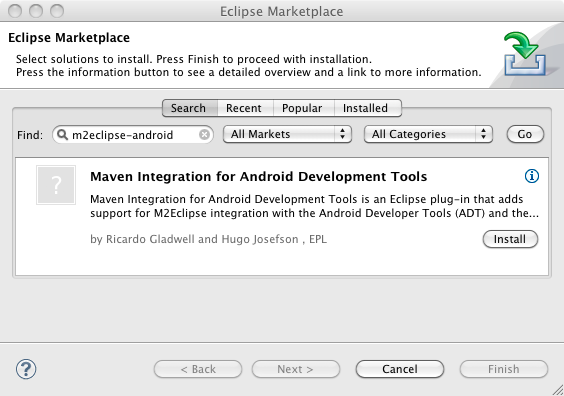
Depending on your version of Eclipse, you may already have the Eclipse Marketplace Client installed. The Marketplace Client will simplify the plugin installation, because it will transitively include any required plugins.


The alternative to using the Marketplace Client is to manually install each plugin. If you installed the plugins from the Marketplace, then you can skip down to the Sample Android Application section. For each plugin, from the Eclipse Help menu, select Install New Software... and click the Add... button.
The first step is to install the ADT (Android Developer Tools) Plugin for Eclipse. This is the official plugin provided by Google for developing Android applications. If you already have the ADT Plugin installed, then verify you have the latest version by running Check for Updates from the Eclipse Help menu.


Note: If you have any trouble with the ADT installation, the Android web site can provide additional information.
The next step is to install the m2eclipse plugin. STS 2.5.2 comes with this plugin. However, if you have a previous release, or if you already have the plugin installed, you need to verify you have the latest version. The Maven Integration for Android Development Tools requires version 0.12.0 or higher.

We've got one more plugin to install, and this is the one that brings all this functionality together. After you have set up the Android SDK and configured the ADT Plugin in Eclipse, install the Maven Integration for Android Development Tools plugin.

Now that we have all the necessary plugins installed and configured, we are ready to try out our setup with a sample Android application. We will use the same sample app created for the Part 1 blog post, however the sample app has been updated to run on the latest Android platform SDK, 2.3.1 API Level 9. If you do not have this SDK platform installed, you will need to do so before building the sample code.
Run the following command to clone the Spring Mobile samples repository.
$ git clone git://git.springsource.org/spring-mobile/samples.git spring-mobile-samples
If the git:// URL is not accessible, you may need to try the alternate URL for the samples repository.
$ git clone http://http.git.springsource.org/spring-mobile/samples.git spring-mobile-samples
Before opening the source code in Eclipse, navigate to the spring-android-showcase/client project directory and verify the project builds with the Android Maven Plugin.
$ mvn clean install
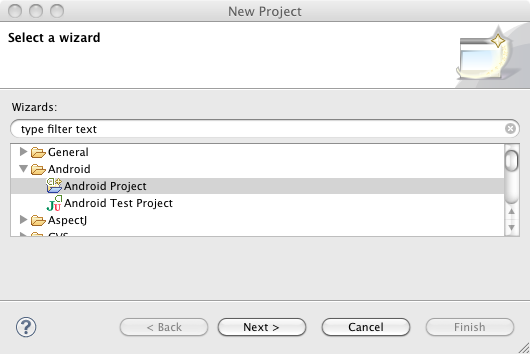
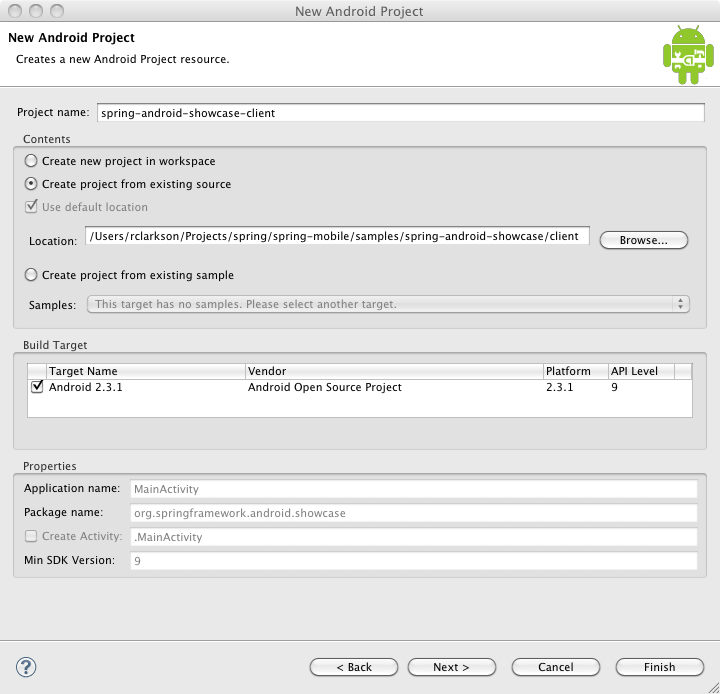
Assuming that the project built from the command line successfully, we are ready to open the project in Eclipse.


The sample project is now loaded into Eclipse. The first thing you will notice is the big red 'X' over the project in the Package Explorer, which indicates it currently does not build. Since we have yet to configure Maven for this project, this is expected behavior.
To enable Maven dependency management, right-click on the spring-android-showcase-client in the Package Explorer, and select Maven -> Enable Dependency Management from the context menu.
The sample project already includes the following Maven POM file. If you did not have an existing POM in your project, Eclipse would have prompted you to create one. Note the use of the maven-android-plugin and maven-compiler plugin in the build section.
<project xmlns="http://maven.apache.org/POM/4.0.0" xmlns:xsi="http://www.w3.org/2001/XMLSchema-instance"
  xsi:schemaLocation="http://maven.apache.org/POM/4.0.0 http://maven.apache.org/xsd/maven-4.0.0.xsd">
	<modelVersion>4.0.0</modelVersion>

	<groupId>org.springframework.android</groupId>
	<artifactId>spring-android-showcase-client</artifactId>
	<version>1.0.0.BUILD-SNAPSHOT</version>
	<packaging>apk</packaging>
	<name>spring-android-showcase-client</name>
	<url>http://www.springsource.org</url>
	<organization>
		<name>SpringSource</name>
		<url>http://www.springsource.org</url>
	</organization>

	<properties>
		<android-platform>9</android-platform>
		<android-emulator>9</android-emulator>
		<maven-android-plugin-version>2.8.4</maven-android-plugin-version>
		<maven-compiler-plugin-version>2.3.2</maven-compiler-plugin-version>
		<android-version>2.3.1</android-version>
		<spring-android-version>1.0.0.M2</spring-android-version>
		<jackson-version>1.7.2</jackson-version>
		<simple-version>2.4.1</simple-version>
		<android-rome-version>1.0.0-r2</android-rome-version>
	</properties>

	<build>
		<sourceDirectory>src</sourceDirectory>
		<finalName>${project.artifactId}</finalName>
		<plugins>
			<plugin>
				<groupId>com.jayway.maven.plugins.android.generation2</groupId>
				<artifactId>maven-android-plugin</artifactId>
				<version>${maven-android-plugin-version}</version>
				<configuration>
					<sdk>
						<platform>${android-platform}</platform>
					</sdk>
					<emulator>
						<avd>${android-emulator}</avd>
					</emulator>
					<deleteConflictingFiles>true</deleteConflictingFiles>
					<undeployBeforeDeploy>true</undeployBeforeDeploy>
				</configuration>
				<extensions>true</extensions>
			</plugin>
			<plugin>
				<artifactId>maven-compiler-plugin</artifactId>
				<version>${maven-compiler-plugin-version}</version>
			</plugin>
		</plugins>
	</build>

	<dependencies>
		<dependency>
			<groupId>com.google.android</groupId>
			<artifactId>android</artifactId>
			<version>${android-version}</version>
			<scope>provided</scope>
		</dependency>
		<dependency>
			<groupId>org.springframework.android</groupId>
			<artifactId>spring-android-rest-template</artifactId>
			<version>${spring-android-version}</version>
		</dependency>
		<dependency>
			<!-- Using Jackson for JSON marshaling -->
			<groupId>org.codehaus.jackson</groupId>
			<artifactId>jackson-mapper-asl</artifactId>
			<version>${jackson-version}</version>
		</dependency>
		<dependency>
			<!-- Using Simple for XML marshaling -->
			<groupId>org.simpleframework</groupId>
			<artifactId>simple-xml</artifactId>
			<version>${simple-version}</version>
			<exclusions>
				<exclusion>
					<artifactId>stax</artifactId>
					<groupId>stax</groupId>
				</exclusion>
				<exclusion>
					<artifactId>stax-api</artifactId>
					<groupId>stax</groupId>
				</exclusion>
			</exclusions>
		</dependency>
		<dependency>
			<!-- Using ROME for RSS and ATOM feeds -->
			<groupId>com.google.code.android-rome-feed-reader</groupId>
			<artifactId>android-rome-feed-reader</artifactId>
			<version>${android-rome-version}</version>
		</dependency>
	</dependencies>

	<repositories>
		<!-- For developing with Android ROME Feed Reader -->
		<repository>
			<id>android-rome-feed-reader-repository</id>
			<name>Android ROME Feed Reader Repository</name>
			<url>https://android-rome-feed-reader.googlecode.com/svn/maven2/releases</url>
		</repository>
		<!-- For testing against latest Spring snapshots -->
		<repository>
			<id>org.springframework.maven.snapshot</id>
			<name>Spring Maven Snapshot Repository</name>
			<url>http://maven.springframework.org/snapshot</url>
			<releases><enabled>false</enabled></releases>
			<snapshots><enabled>true</enabled></snapshots>
		</repository>
		<!-- For developing against latest Spring milestones -->
		<repository>
			<id>org.springframework.maven.milestone</id>
			<name>Spring Maven Milestone Repository</name>
			<url>http://maven.springframework.org/milestone</url>
			<snapshots><enabled>false</enabled></snapshots>
		</repository>
	</repositories>

</project>
Maven will now update the required dependencies and Eclipse should successfully build the project. Once Eclipse is finished building the project, you should now see the Maven Dependencies classpath container in the Package Explorer window.
There are a couple things to note. First you may see there is a bin folder in the project. You can see from the Java Build Path properties (below) that the default output folder is the Target folder. So it is safe to remove the bin folder.
Second, you may also notice that there is a JRE System Library classpath container that was added to the project. Since we are building an Android app that utilizes the Android JVM you should not need to reference the JRE. If you have created a new Android app in Eclipse with the ADT, you know that it does not add a classpath container for the JRE. I have discussed this with the Maven Integration for Android Development Tools developer, Ricardo Gladwell, and he created a ticket to research the issue. I have removed the JRE from the sample project without any obvious, negative effects. But you may want to keep watch on that issue for more information.
To run the sample application, simply select the spring-android-showcase-client in the Package Explorer, and click the Run button. The Maven POM file in the sample client is configured to look for an Android Virtual Device (AVD) named "9". As mentioned earlier, the samples project has been updated to run on the Android Platform SDK 2.3.1. You need to have an AVD configured for this platform for the samples to run.
The first time you run the app, you should see something like the following in the Eclipse console:
[2011-02-08 14:00:49 - spring-android-showcase-client] ------------------------------
[2011-02-08 14:00:49 - spring-android-showcase-client] Android Launch!
[2011-02-08 14:00:49 - spring-android-showcase-client] adb is running normally.
[2011-02-08 14:00:49 - spring-android-showcase-client] Performing org.springframework.android.showcase.MainActivity activity launch
[2011-02-08 14:00:49 - spring-android-showcase-client] Automatic Target Mode: launching new emulator with compatible AVD '9'
[2011-02-08 14:00:49 - spring-android-showcase-client] Launching a new emulator with Virtual Device '9'
[2011-02-08 14:00:50 - Emulator] 2011-02-08 14:00:50.936 emulator[5951:903] Warning once: This application, or a library it uses, is using NSQuickDrawView, which has been deprecated. Apps should cease use of QuickDraw and move to Quartz.
[2011-02-08 14:00:50 - spring-android-showcase-client] New emulator found: emulator-5554
[2011-02-08 14:00:50 - spring-android-showcase-client] Waiting for HOME ('android.process.acore') to be launched...
[2011-02-08 14:01:21 - spring-android-showcase-client] HOME is up on device 'emulator-5554'
[2011-02-08 14:01:21 - spring-android-showcase-client] Uploading spring-android-showcase-client.apk onto device 'emulator-5554'
[2011-02-08 14:01:23 - spring-android-showcase-client] Installing spring-android-showcase-client.apk...
[2011-02-08 14:01:50 - spring-android-showcase-client] Success!
[2011-02-08 14:01:50 - spring-android-showcase-client] Starting activity org.springframework.android.showcase.MainActivity on device emulator-5554
[2011-02-08 14:01:52 - spring-android-showcase-client] ActivityManager: Starting: Intent { act=android.intent.action.MAIN cat=[android.intent.category.LAUNCHER] cmp=org.springframework.android.showcase/.MainActivity }
The AVD will start and display the locked screen. Slide the green lock from left to right to "open" the Android device. Once opened, the app should now display:
In this post we've reviewed how to build a sample Android application in Eclipse that utilizes Maven dependency management. To accomplish this, we've used Eclipse, the Android Development Tools (ADT) Plugin for Eclipse, the Maven Android Plugin, the Maven Integration for Android Development Tools plugin, and the Maven Integration for Eclipse (m2eclipse) plugin. There are a lot of pieces involved, but once you have everything configured, it is easy to build and deploy to the Android emulator. If you are using third party libraries within your Android application, you should consider using these tools to help manage those dependencies.