Get ahead
VMware offers training and certification to turbo-charge your progress.
Learn moreThis article explores the different options that Spring Boot developers have for using Javascript and CSS on the client (browser) side of their application. Part of the plan is to explore some Javascript libraries that play well in the traditional server-side-rendered world of Spring web applications. Those libraries tend to have a light touch for the application developer, in the sense that they allow you to completely avoid Javascript, but still have nice a progressive "modern" UI. We also look at some more "pure" Javascript tools and frameworks. It’s kind of a spectrum, so as a TL;DR here is a list of the sample apps, in rough order of low to high Javascript content:
htmx: HTMX is a library that allows you to access modern browser features directly from HTML, rather than using javascript. It is very easy to use and well suited to server-side rendering because it works by replacing sections of the DOM directly from remote responses. It seems to be well used and appreciated by the Python community.
turbo: Hotwired (Turbo and Stimulus). Turbo is a bit like HTMX. It is widely used and supported well in Ruby on Rails. Stimulus is a lightweight library that can be used to implement tiny bits of logic that prefer to live on the client.
vue: Vue is also very lightweight and describes itself as "progressive" and "incrementally adoptable". It is versatile in the sense that you can use a very small amount of Javascript to do something nice, or you can push on through and use it as a full-blown framework.
react-webjars: uses the React framework, but without a Javascript build or bundler. React is nice in that way because, like Vue, it allows you to just use it in a few small areas, without it taking over the whole source tree.
nodejs: like the turbo sample but using Node.js to build and bundle the scripts, instead of Webjars. If you get serious about React, you will probably end up doing this, or something like it. The aim here is to use Maven to drive the build, at least optionally, so that the normal Spring Boot application development process works. Gradle would work the same.
react: is the react-webjars sample, but with the Javascript build steps from the nodejs sample.
There is another sample using Spring Boot and HTMX here. If you want to know more about React and Spring there is a tutorial on the Spring website. There is also content on Angular via another tutorial on the Spring website and the related getting started content here. If you are interested in Angular and Spring Boot Matt Raible has a Minibook. The spring.io website (source code) is also a Node.js build and uses a completely different toolchain and set of libraries. Another source of alternative approaches is JHipster which also has support for a few of the libraries used here. Finally the Petclinic, while it has no Javascript, does have some client side code in the stylesheets and a build process driven from Maven.
Table of Contents
All the samples can be built and run with standard Spring Boot processes (e.g. see this getting started guide). The Maven wrapper is in the parent directory so from each sample on the command line you can ../mvnw spring-boot:run to run the apps or ../mvnw package to get an executable JAR. E.g.
$ cd htmx
$ ../mvnw package
$ java -jar target/js-demo-htmx-0.0.1.jar
The Github project works well in Codespaces and was developed mostly locally with VSCode. Feel free to use whatever IDE you prefer though, they should all work fine.
Browser application development is a huge landscape of ever-changing options and choices. It would be impossible to present all those options in one coherent picture, so we have intentionally limited the scope of tools and frameworks we look at. We start with a bias of wanting to find something that works with a light touch, or is at least incrementally adoptable. There is also the previously mentioned bias towards libraries that work well with server-side renderers - those that deal with fragments and subtrees of HTML. Also, we have used Javascript ESM wherever possible, since most browsers now support that. However, most libraries that publish a module to import also have an equivalent bundle you can require, so you can always stick to that if you prefer.
Many of the samples use Webjars to deliver the Javascript (and CSS) assets to the client. This is very easy and sensible for an application with a Java backend. Not all the samples use Webjars though, and it wouldn’t be hard to convert the ones that do to either use a CDN (like unpkg.com or jsdelivr.com) or a build time Node.js bundler. The samples here that do have a bundler use Rollup, but you could just as well use Webpack, for instance. They also use straight NPM and not Yarn or Gulp, which are both popular choices. All the samples use Bootstrap for CSS, but other choices are available.
There are also choices that can be made on the server side. We have used Spring Webflux but Spring MVC would work identically. We have used Maven as a build tool, but using Gradle it would be easy to achieve the same goals. All the samples actually have a static home page (not even rendered as a template), but they all have some dynamic content, and we have chosen JMustache for that. Thymeleaf (and other templating engines) would work just as well. In fact Thymeleaf has built-in support for fragments and that can be quite useful when you are updating parts of a page dynamically, which is one of our goals. You could do that same with Mustache (probably) with a bit of work, but we didn’t need it in these samples.
To get started with Spring Boot and client-side development, let’s start at the beginning, with an empty app from Spring Initializr. You can go to the website and download a project with web dependencies (select Webflux or WebMVC) and open it up in your IDE. Or to generate a project from the command line you can use curl, starting form an empty directory:
$ curl https://start.spring.io/starter.tgz -d dependencies=webflux -d name=js-demo | tar -xzvf -
We can add a really basic static home page at src/main/resources/static/index.html:
<!doctype html>
<html lang="en">

<head>
	<meta charset="utf-8" />
	<meta http-equiv="X-UA-Compatible" content="IE=edge" />
	<title>Demo</title>
	<meta name="description" content="" />
	<meta name="viewport" content="width=device-width" />
	<base href="/" />
</head>

<body>
	<header>
		<h1>Demo</h1>
	</header>
	<main>
		<div class="container">
			<div id="greeting">Hello World</div>
		</div>
	</main>

</body>

</html>
and then run the app:
$ ./mvnw package
$ java target/js-demo-0.0.1-SNAPSHOT.jar
and you can see the result on localhost:8080.
To start building client-side features, let’s add some CSS out of the box from Bootstrap. We could use a CDN, like this for example in index.html:
...
<head>
	...
	<link rel="stylesheet" type="text/css" href="https://unpkgs.com/bootstrap/dist/css/bootstrap.min.css" />
</head>
...
That’s really convenient, if you want to get started quickly. For some apps it might be all you need. Here we take a different approach that makes our app more self-contained, and aligns well with the Java tooling we are used to - that is to use a Webjar and package the Bootstrap libraries in our JAR file. To do that we need to add a couple of dependencies to the pom.xml:
<dependency>
	<groupId>org.webjars</groupId>
	<artifactId>webjars-locator-core</artifactId>
</dependency>
<dependency>
	<groupId>org.webjars.npm</groupId>
	<artifactId>bootstrap</artifactId>
	<version>5.1.3</version>
</dependency>
and then in index.html instead of the CDN we use a resource path inside the application:
...
<head>
	...
	<link rel="stylesheet" type="text/css" href="/webjars/bootstrap/dist/css/bootstrap.min.css" />
</head>
...
If you rebuild and/or re-run the application you will see nice vanilla Bootstrap styles instead of the boring default browser versions. Spring Boot uses the webjars-locator-core to locate the version and exact location of the resource in the classpath, and the browser sucks that stylesheet into the page.
Bootstrap is also a Javascript library, so we can start to use it more fully by taking advantage of that. We can add the Bootstrap library in index.html like this:
...
<head>
...
	<script src="/webjars/bootstrap/dist/js/bootstrap.min.js"></script>
</head>
...
It doesn’t do anything visible yet, but you can verify that it is loaded by the browser using the devtools view (F12 in Chrome or Firefox).
We said in the introduction that we would use ESM modules where available, and Bootstrap has one, so let’s get that working. Replace the <script> tag in index.html with this:
<script type="importmap">
	{
		"imports": {
			"bootstrap": "/webjars/bootstrap/dist/js/bootstrap.esm.min.js"
		}
	}
</script>
<script type="module">
	import 'bootstrap';
</script>
There are two parts to this: an "importmap" and a "module". The import map is a feature of the browser allowing you to refer to ESM modules by name, mapping the name to a resource. If you run the app now and load it in the browser there should be an error in the console because the ESM bundle of Bootstrap has a dependency on PopperJS:
Uncaught TypeError: Failed to resolve module specifier "@popperjs/core". Relative references must start with either "/", "./", or "../".
PopperJS is not a mandatory transitive dependency of the Bootstrap Webjar, so we have to include it in our pom.xml:
<dependency>
	<groupId>org.webjars.npm</groupId>
	<artifactId>popperjs__core</artifactId>
	<version>2.10.1</version>
</dependency>
(Webjars use the "__" infix instead of a "@" prefix for namespaced NPM module names.) Then it can be added to the import map:
<script type="importmap">
	{
		"imports": {
			"bootstrap": "/webjars/bootstrap/dist/js/bootstrap.esm.min.js",
			"@popperjs/core": "/webjars/popperjs__core/lib/index.js"
		}
	}
</script>
and this will fix the console error.
The resource paths inside a Webjar (e.g. /bootstrap/dist/js/bootstrap.esm.min.js) are not standardized - there is no naming convention that allows you to guess the location of the ESM module inside a Webjar, or an NPM module which amounts to the same thing. But there are some conventions in NPM modules that make it possible to automate: most modules have a package.json with a "module" field. E.g. from Bootstrap you can find the version and the module resource path:
{
  "name": "bootstrap",
  "description": "The most popular front-end framework for developing responsive, mobile first projects on the web.",
  "version": "5.1.3",
...
  "module": "dist/js/bootstrap.esm.js",
...
}
CDNs like unpkg.com make use of this information, so you can use them when you know only the ESM module name. E.g. this should work:
<script type="importmap">
	{
		"imports": {
			"bootstrap": "https://unpkg.com/bootstrap",
			"@popperjs/core": "https://unpkg.com/@popperjs/core"
		}
	}
</script>
It would be nice to be able to do the same with /webjars resource paths. That’s what the NpmVersionResolver in all the samples does. You don’t need it if you don’t use Webjars and you can use a CDN, and you don’t need it if you don’t mind manually opening up all the package.json files and looking for the module path. But it’s nice to not have to think about that. There’s a feature request asking for this to be included in Spring Boot. Another feature of the NpmVersionResolver is that it knows about the Webjars metadata, so it can resolve the version of each Webjar from the classpath, and we don’t need that webjars-locator-core dependency (there’s an open issue in Spring Framework to add this feature).
So in the sample the import map is like this:
<script type="importmap">
	{
		"imports": {
			"bootstrap": "/npm/bootstrap",
			"@popperjs/core": "/npm/@popperjs/core"
		}
	}
</script>
All you need to know is the NPM module name, and the resolver figures out how to find a resource that resolves to the ESM bundle. It uses a Webjar if there is one, and otherwise redirects to a CDN.
Note: Most modern browsers support modules and module maps. Those that don’t can be used in our app at the cost of adding a shim library. It is already included in the samples.
We might as well use the Bootstrap styles now we have it all working. So how about some tabs with content and a button or two to press? Sounds good. First the <header/> with the tab links in index.html:
<header>
	<h1>Demo</h1>
	<nav class="nav nav-tabs">
		<a class="nav-link active" data-bs-toggle="tab" data-bs-target="#message" href="#">Message</a>
		<a class="nav-link" data-bs-toggle="tab" data-bs-target="#stream" href="#">Stream</a>
	</nav>
</header>
The second (default inactive) tab is called "stream" because part of the samples will be exploring the use of Server Sent Event streams. The tab contents look like this in the <main/> section:
<main>
	<div class="tab-content">
		<div class="tab-pane fade show active" id="message" role="tabpanel">
			<div class="container">
				<div id="greeting">Hello World!</div>
			</div>
		</div>
		<div class="tab-pane fade" id="stream" role="tabpanel">
			<div class="container">
				<div id="load">Nothing here yet...</div>
			</div>
		</div>
	</div>
</main>
Note how one of the tabs is "active" and both have ids that match up with the data-bs-target attributes in the header. That’s why we need some Javascript - to handle the click events on the tabs so that the correct content is revealed or hidden. The Bootstrap docs have loads of examples of different tab styles and layouts. One nice thing about the basic features here is that they can automatically render as drop downs on a narrow device like a mobile phone (with some small changes to the class attributes in the <nav/> - you can look at the Petclinic to see how). In a browser it looks like this:

and of course if you click on the "Stream" tab it reveals some different content.
We can add some dynamic content really quickly with HTMX. First we need the Javascript library, so we add it as a Webjar:
<dependency>
	<groupId>org.webjars.npm</groupId>
	<artifactId>htmx.org</artifactId>
	<version>1.6.0</version>
</dependency>
and then import it in index.html:
<script type="importmap">
	{
		"imports": {
			"bootstrap": "/npm/bootstrap",
			"@popperjs/core": "/npm/@popperjs/core",
			"htmx": "/npm/htmx.org"
		}
	}
</script>
<script type="module">
	import 'bootstrap';
	import 'htmx';
</script>
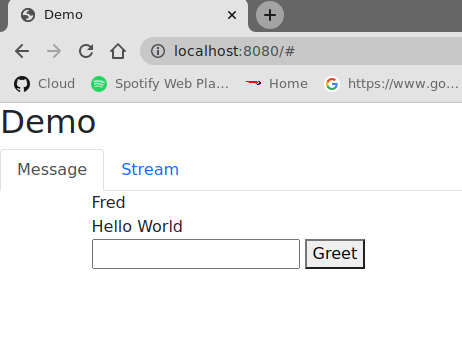
Then we can change the greeting from "Hello World" to something that comes from user input. Let’s add an input field and a button to the main tab:
<div class="container">
	<div id="greeting">Hello World</div>
	<input id="name" name="value" type="text" />
	<button hx-post="/greet" hx-target="#greeting" hx-include="#name">Greet</button>
</div>
The input field is unadorned, and the button has some hx-* attributes that are grabbed by the HTMX library and used to enhance the page. These ones say "when user clicks on this button, send a POST to /greet, including the 'name' in the request, and render the result by replacing the content of the 'greeting'". If the user enters "Foo" in the input field, the POST has a form-encoded body of value=Foo because "value" is the name of the field identified by #name.
Then all we need is a /greet resource in the backend:
@SpringBootApplication
@RestController
public class JsDemoApplication {

	@PostMapping("/greet")
	public String greet(@ModelAttribute Greeting values) {
		return "Hello " + values.getValue() + "!";
	}

	...

	static class Greeting {
		private String value;

		public String getValue() {
			return value;
		}

		public void setValue(String value) {
			this.value = value;
		}
	}
}
Spring will bind the "value" parameter in the incoming request to the Greeting and we convert it to text which is then injected in the <div id="greeting"/> on the page. You can use HTMX to inject plain text like this, or whole fragments of HTML. Or you can append (or prepend) to a list of existing elements, like rows in a table, or items in a list.
Here’s another thing you can do:
<div class="container">
	<div id="auth" hx-trigger="load" hx-get="/user">
		Unauthenticated
	</div>
	...
</div>
This does a GET to /user when the page loads and swaps the content of the element. The sample app has this endpoint and it returns "Fred" so you see it rendered like this:
There are many other neat things you can do with HTMX, and one of those is to render a Server Sent Event (SSE) stream. First we’ll add an endpoint to the backend app:
@SpringBootApplication
@RestController
public class JsDemoApplication {

	@GetMapping(path = "/stream", produces = MediaType.TEXT_EVENT_STREAM_VALUE)
	public Flux<String> stream() {
		return Flux.interval(Duration.ofSeconds(5)).map(
			value -> value + ":" + System.currentTimeMillis()
		);
	}

	...
}
So we have a stream of messages rendered by Spring by virtue of the produces attribute on the endpoint mapping:
$ curl localhost:8080/stream
data:0:1639472861461

data:1:1639472866461

data:2:1639472871461

...
HTMX can inject those messages into our page. Here’s how in index.html added to the "stream" tab:
<div class="container">
	<div id="load" hx-sse="connect:/stream">
		<div id="load" hx-sse="swap:message"></div>
	</div>
</div>
We connect to the /stream using the connect:/stream attribute and then pull event data out using swap:message. Actually "message" is the default event type, but SSE payloads can also specify other types by including a line starting with event:, and so you could have a stream that multiplexes many different event types and have them each affect the HTML in different ways.
The endpoint in our backend above is very simple: it just sends back plain strings, but it could do more. E.g. it could send back fragments of HTML and they would be injected into the page. The sample applications do it with a custom Spring Webflux component named CompositeViewRenderer (requested as a feature here for the Framework), where @Contoller method can return a Flux<Rendering> (in MVC it would be Flux<ModelAndView>). It enables an endpoint to stream dynamic views:
@GetMapping(path = "/stream", produces = MediaType.TEXT_EVENT_STREAM_VALUE)
public Flux<Rendering> stream() {
	return Flux.interval(Duration.ofSeconds(5)).map(value -> Rendering.view("time")
			.modelAttribute("value", value)
			.modelAttribute("time", System.currentTimeMillis()).build());
}
This is paired with a view named "time" and the normal Spring machinery renders the model:
$ curl localhost:8080/stream
data:<div>Index: 0, Time: 1639474490435</div>

data:<div>Index: 1, Time: 1639474495435</div>

data:<div>Index: 2, Time: 1639474500435</div>

...
The HTML comes from a template:
<div>Index: {{value}}, Time: {{time}}</div>
which in turn works automatically because we included JMustache on the classpath in pom.xml:
<dependency>
	<groupId>org.springframework.boot</groupId>
	<artifactId>spring-boot-starter-mustache</artifactId>
</dependency>
HTMX can still do more. Instead of an SSE stream, an endpoint can return a regular HTTP response, but compose it as a set of elements to swap on the page. HTMX calls this an "out of band" swap because it involves enhancing content of elements on the page that are not the same as the one that triggered the download.
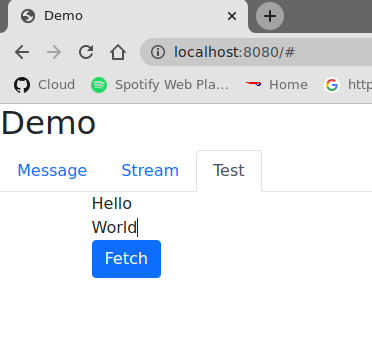
To see this work we can add another tab with some HTMX-enabled content:
<div class="tab-pane fade" id="test" role="tabpanel">
	<div class="container">
		<div id="hello"></div>
		<div id="world"></div>
		<button class="btn btn-primary" hx-get="/test" hx-swap="none">Fetch</button>
	</div>
</div>
Don’t forget to add a nav link so the user can see this tab:
<nav class="nav nav-tabs">
	...
	<a class="nav-link" data-bs-toggle="tab" data-bs-target="#test" href="#">Test</a>
</nav>
...
The new tab has a button that fetches dynamic content from /test and it also sets up 2 empty divs "hello" and "world" to receive the content. The hx-swap="none" is important - it tells HTMX not to replace the content of the element that triggered the GET.
If we have an endpoint that returns this:
$ curl localhost:8080/test
<div id="hello" hx-swap-oob="true">Hello</div>
<div id="world" hx-swap-oob="true">World</div>
then the page renders like this (after the "Fetch" button is pressed):
A simple implementation of this endpoint would be
@GetMapping(path = "/test")
public String test() {
	return "<div id=\"hello\" hx-swap-oob=\"true\">Hello</div>\n"
		+ "<div id=\"world\" hx-swap-oob=\"true\">World</div>";
}
or (using the custom view renderer):
@GetMapping(path = "/test")
public Flux<Rendering> test() {
	return Flux.just(
			Rendering.view("test").modelAttribute("id", "hello")
				.modelAttribute("value", "Hello").build(),
			Rendering.view("test").modelAttribute("id", "world")
				.modelAttribute("value", "World").build());
}
with a template "test.mustache":
<div id="{{id}}" hx-swap-oob="true">{{value}}</div>
Another thing that HTMX does is "boost" all the links and form actions in your page, so that they automatically work using an XHR request instead of a full page refresh. That’s a really simple way to segment your page by feature and update only the bits that you need. You can also easily do that in a "progressive" way - i.e. the application works with full page refreshes if Javascript is disabled, but is zippier and feels more "modern" if Javascript is enabled.
Hotwired is a little bit similar to HTMX, so let’s replace the libraries an get the app working. Take out HTMX and add Hotwired (Turbo) to the application. In pom.xml:
<dependency>
	<groupId>org.webjars.npm</groupId>
	<artifactId>hotwired__turbo</artifactId>
	<version>7.1.0</version>
</dependency>
Then we can import it into our page by adding an import map:
<script type="importmap">
	{
		"imports": {
			...
			"@hotwired/turbo": "/npm/@hotwired/turbo"
		}
	}
</script>
and a script to import the library:
<script type="module">
	import * as Turbo from '@hotwired/turbo';
</script>
This lets us do the dynamic content stuff that we already did with HTMX with a few changes to the HTML. Here’s the "test" tab in index.html:
<div class="tab-pane fade" id="test" role="tabpanel">
	<turbo-frame id="turbo">
		<div class="container" id="frame">
			<div id="hello"></div>
			<div id="world"></div>
			<form action="/test" method="post">
				<button class="btn btn-primary" type="submit">Fetch</button>
			</form>
		</div>
	</turbo-frame>
</div>
Turbo works a little differently than HTMX. The <turbo-frame/> tells Turbo that everything inside is enhanced (a bit like an HTMX boost). And to replace the "hello" and "world" elements on a button click, we need the button to send a POST through a form, not just a plain GET (Turbo is more opinionated about this than HTMX). The /test endpoint then sends back some <turbo-stream/> fragments containing templates with the content we want to replace:
<turbo-stream action="replace" target="hello">
        <template>
                <div id="hello">Hi Hello!</div>
        </template>
</turbo-frame>

<turbo-stream action="replace" target="world">
        <template>
                <div id="world">Hi World!</div>
        </template>
</turbo-frame>
To make Turbo take notice of the incoming <turbo-stream/> we need the /test endpoint to return a custom Content-Type: text/vnd.turbo-stream.html so the implementation looks like this:
@PostMapping(path = "/test", produces = "text/vnd.turbo-stream.html")
public Flux<Rendering> test() {
	return ...;
}
To serve the custom content type we need a custom view resolver:
@Bean
@ConditionalOnMissingBean
MustacheViewResolver mustacheViewResolver(Compiler mustacheCompiler, MustacheProperties mustache) {
	MustacheViewResolver resolver = new MustacheViewResolver(mustacheCompiler);
	resolver.setPrefix(mustache.getPrefix());
	resolver.setSuffix(mustache.getSuffix());
	resolver.setViewNames(mustache.getViewNames());
	resolver.setRequestContextAttribute(mustache.getRequestContextAttribute());
	resolver.setCharset(mustache.getCharsetName());
	resolver.setOrder(Ordered.LOWEST_PRECEDENCE - 10);
	resolver.setSupportedMediaTypes(
			Arrays.asList(MediaType.TEXT_HTML, MediaType.valueOf("text/vnd.turbo-stream.html")));
	return resolver;
}
The above is a copy of the @Bean defined automatically by Spring Boot but with an additional supported media type. There is an open feature request to allow this to be done via application.properties.
The result of clicking the "Fetch" button should be to render "Hello" and "World" as before.
Turbo also has built in support for SSE rendering, but this time the event data has to have <turbo-stream/> elements in it. For example:
$ curl localhost:8080/stream
data:<turbo-stream action="replace" target="load">
data:   <template>
data:           <div id="load">Index: 0, Time: 1639482422822</div>
data:   </template>
data:</turbo-stream>

data:<turbo-stream action="replace" target="load">
data:   <template>
data:           <div id="load">Index: 1, Time: 1639482427821</div>
data:   </template>
data:</turbo-stream>
Then the "stream" tab just needs an empty <div id="load"></div> and Turbo will do what it was asked (replace the element identified by "load"):
<div class="tab-pane fade" id="stream" role="tabpanel">
	<div class="container">
		<div id="load"></div>
	</div>
</div>
Both Turbo and HTMX allow you to target elements for dynamic content by id or by CSS style matcher, both for regular HTTP responses and SSE streams.
There is another library in Hotwired called Stimulus that lets you add more customized behaviour using small amounts of Javascript. It comes in handy if you have an endpoint in your backend service that returns JSON not HTML, for instance. We can get started with Stimulus by adding it as a dependency in pom.xml:
<dependency>
	<groupId>org.webjars.npm</groupId>
	<artifactId>hotwired__stimulus</artifactId>
	<version>3.0.1</version>
</dependency>
and with an import map in index.html:
<script type="importmap">
	{
		"imports": {
			...
			"@hotwired/stimulus": "/npm/@hotwired/stimulus"
		}
	}
</script>
Then we are in good shape to replace the piece of the main "message" tab that we did with HTMX before. Here’s the tab content covering just the button and custom message:
<div class="tab-pane fade show active" id="message" role="tabpanel">
	<div class="container" data-controller="hello">
		<div id="greeting" data-hello-target="output">Hello World</div>
		<input id="name" name="value" type="text" data-hello-target="name" />
		<button class="btn btn-primary" data-action="click->hello#greet">Greet</button>
	</div>
</div>
Notice the data-* attributes. There is a controller ("hello") declared on the container <div> that we need to implement. Its action in the button element says "when this button is clicked, call the function 'greet' on the 'hello' controller". And there are some decorations that identify which elements have input and output for the controller (the data-hello-target attributes). The Javascript to implement the custom message renderer looks like this:
<script type="module">
	import { Application, Controller } from '@hotwired/stimulus';
	window.Stimulus = Application.start();

	Stimulus.register("hello", class extends Controller {
		static targets = ["name", "output"]
		greet() {
			this.outputTarget.textContent = `Hello, ${this.nameTarget.value}!`;
		};
	});
</script>
The Controller is registered with the data-controller name from the HTML, and it has a targets field that enumerates all the ids of elements that it wants to target. It can then refer to them by a naming convention, e.g. "output" shows up in the controller as a reference to a DOM element called outputTarget.
You can do more or less anything you like in the Controller, so for example you could pull some content from the backend. The turbo sample does that by pulling a string from the /user endpoint and inserting it in an "auth" target element:
<div class="container" data-controller="hello">
	<div id="auth" data-hello-target="auth"></div>
	...
</div>
with the complementary Javascript:
Stimulus.register("hello", class extends Controller {
	static targets = ["name", "output", "auth"]
	initialize() {
		let hello = this;
		fetch("/user").then(response => {
			response.json().then(data => {
				hello.authTarget.textContent = `Logged in as: ${data.name}`;
			});
		});
	}
	...
});
We can have some fun adding other Javascript libraries, for instance some nice graphics. Here’s a new tab in index.html (remember to add the <nav/> link as well):
<div class="tab-pane fade" id="chart" role="tabpanel" data-controller="chart">
	<div class="container">
		<canvas data-chart-target="canvas"></canvas>
	</div>
	<div class="container">
		<button class="btn btn-primary" data-action="click->chart#clear">Clear</button>
		<button class="btn btn-primary" data-action="click->chart#bar">Bar</button>
	</div>
</div>
It has an empty <canvas/> that we can fill in with a bar chart using Chart.js. In preparation for that we declared a controller called "chart" in the HTML above and labelled the target element for it with data-*-target. So let’s start by adding Chart.js to the application. In pom.xml:
<dependency>
	<groupId>org.webjars.npm</groupId>
	<artifactId>chart.js</artifactId>
	<version>3.6.0</version>
</dependency>
and in index.html we add an import map and some Javascript to render the chart:
<script type="importmap">
{
	"imports": {
		...
		"chart.js": "/npm/chart.js"
	}
}
</script>
and the new controller implementing the "bar" and "clear" actions from the buttons in the HTML:
import { Chart, BarController, BarElement, LinearScale, CategoryScale, Title, Legend } from 'chart.js';
Chart.register(BarController, BarElement, LinearScale, CategoryScale, Title, Legend);

Stimulus.register("chart", class extends Controller {
	static targets = ["canvas"]
	bar(type) {
		let chart = this;
		this.clear();
		fetch("/pops").then(response => {
			response.json().then(data => {
				data.type = "bar";
				chart.active = new Chart(chart.canvasTarget, data);
			});
		});;
		clear() {
			if (this.active) {
				this.active.destroy();
			}
		};
	};
});
To service this we need a /pops endpoint with some chart data (estimated world population by continent according to Wikipedia):
$ curl localhost:8080/pops | jq .
{
  "data": {
    "labels": [
      "Africa",
      "Asia",
      "Europe",
      "Latin America",
      "North America"
    ],
    "datasets": [
      {
        "backgroundColor": [
          "#3e95cd",
          "#8e5ea2",
          "#3cba9f",
          "#e8c3b9",
          "#c45850"
        ],
        "label": "Population (millions)",
        "data": [
          2478,
          5267,
          734,
          784,
          433
        ]
      }
    ]
  },
  "options": {
    "plugins": {
      "legend": {
        "display": false
      },
      "title": {
        "text": "Predicted world population (millions) in 2050",
        "display": true
      }
    }
  }
}
The sample app has a few more charts, all showing the same data in different formats. They are all serviced by the same endpoint illustrated above:
@GetMapping("/pops")
@ResponseBody
public Chart bar() {
	return new Chart();
}
In Spring guides and reference documentation we often see blocks of code segmented by "type" (e.g. Maven vs. Gradle, or XML vs. Java). They are shown with one option active and the rest hidden, and if the user clicks on another option, not just the closest code snippets, but all the snippets in the whole document that match the click are revealed. For example if the user clicks on "Gradle" all the code snippets that refer to "Gradle" are simultaneously activated. The Javascript that drives that feature exists in several forms, depending on which guide or project is using it, and one of those forms is as an NPM bundle @springio/utils. It’s not strictly an ESM module but we can still import it and see the feature working. Here’s what it looks like in index.html:
<script type="importmap">
	{
		"imports": {
			...
			"@springio/utils": "/npm/@springio/utils"
		}
	}
</script>
<script type="module">
	...
	import '@springio/utils';
</script>
and then we can add a new tab with some "code snippets" (just junk content in this case):
<div class="tab-pane fade" id="docs" role="tabpanel">
	<div class="container" title="Content">
		<div class="content primary"><div class="title">One</div><div class="content">Some content</div></div>
		<div class="content secondary"><div class="title">Two</div><div class="content">Secondary</div></div>
		<div class="content secondary"><div class="title">Three</div><div class="content">Third option</div></div>
	</div>
	<div class="container" title="Another">
		<div class="content primary"><div class="title">One</div><div class="content">Some more content</div></div>
		<div class="content secondary"><div class="title">Two</div><div class="content">Secondary stuff</div></div>
		<div class="content secondary"><div class="title">Three</div><div class="content">Third option again</div></div>
	</div>
</div>
It looks like this if the user selects the "One" block type:
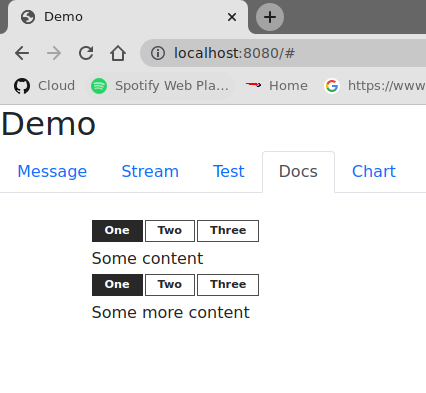
The thing that drives the behaviour is the structure of the HTML, with one element labelled "primary" and alternatives as "secondary", then a nested class="title" before the actual content. The title is pulled out into the buttons by the Javascript.
Vue is a lightweight Javascript library that you can use a little of or a lot. To get started with Webjars we would need the dependency in pom.xml:
<dependency>
	<groupId>org.webjars.npm</groupId>
	<artifactId>vue</artifactId>
	<version>2.6.14</version>
</dependency>
and add it to the import map in index.html (using a manual resource path because the "module" in the NPM bundle points to something that doesn’t work in a browser):
<script type="importmap">
	{
		"imports": {
			...
			"vue": "/npm/vue/dist/vue.esm.browser.js"
		}
	}
</script>
Then we can write a component and "mount" it in a named element (it’s an example from the Vue user guide):
<script type="module">
	import Vue from 'vue';

	const EventHandling = {
		data() {
			return {
				message: 'Hello Vue.js!'
			}
		},
		methods: {
			reverseMessage() {
				this.message = this.message
					.split('')
					.reverse()
					.join('')
			}
		}
	}

	new Vue(EventHandling).$mount("#event-handling");
</script>
To receive the dynamic content we need an element that matches #event-handling, e.g.
<div class="tab-pane fade" id="test" role="tabpanel">
	<div class="container" id="event-handling">
		<p>{{ message }}</p>
		<button class="btn btn-primary" v-on:click="reverseMessage">Reverse Message</button>
	</div>
</div>
So the templating happens on the client, and it is triggered by a click using v-on from Vue.
If we want to replace Hotwired with Vue we could start with the content on the main "message" tab. So we can replace the Stimulus controller bindings with this, for example:
<div class="tab-pane fade show active" id="message" role="tabpanel">
	<div class="container">
		<div id="auth">
			{{user}}
		</div>
		<div id="greeting">{{greeting}}</div>
		<input id="name" name="value" type="text" v-model="name" />
		<button class="btn btn-primary" v-on:click="greet">Greet</button>
	</div>
</div>
and then hook the user and greeting properties in through Vue:
import Vue from 'vue';

const EventHandling = {
	data() {
		return {
			greeting: '',
			name: '',
			user: 'Unauthenticated'
		}
	},
	created: function () {
		let hello = this;
		fetch("/user").then(response => {
			response.json().then(data => {
				hello.user = `Logged in as: ${data.name}`;
			});
		});
	},
	methods: {
		greet() {
			this.greeting = `Hello, ${this.name}!`;
		},
	}
}

new Vue(EventHandling).$mount("#message");
The created hook is run as part of the Vue component lifecycle, so it’s not necessarily going to be run precisely the same time as Stimulus did it, but it’s close enough.
We can also replace the chart picker with a Vue, and then we can get rid of Stimulus, just to see what it looks like. Here’s the chart tab (basically the same as before but without the controller decorations):
<div class="tab-pane fade" id="chart" role="tabpanel">
	<div class="container">
		<canvas id="canvas"></canvas>
	</div>
	<div class="container">
		<button class="btn btn-primary" v-on:click="clear">Clear</button>
		<button class="btn btn-primary" v-on:click="bar">Bar</button>
	</div>
</div>
and here’s the Javascript code to render the chart:
<script type="module">
	import Vue from 'vue';

	import { Chart, BarController, BarElement, LinearScale, CategoryScale, Title, Legend } from 'chart.js';
	Chart.register(BarController, BarElement, LinearScale, CategoryScale, Title, Legend);

	const ChartHandling = {
		methods: {
			clear() {
				if (this.active) {
					this.active.destroy();
				}
			},
			bar() {
				let chart = this;
				this.clear();
				fetch("/pops").then(response => {
					response.json().then(data => {
						data.type = "bar";
						chart.active = new Chart(document.getElementById("canvas"), data);
					});
				});
			}
		}
	}

	new Vue(ChartHandling).$mount("#chart");
</script>
The sample code also has "pie" and "doughnut" in addition to the "bar" chart type, and they work the same way.
Vue can replace the entire inner HTML of an element using the v-html attribute, so we can start to re-implement the Turbo content with that. Here’s the new "test" tab:
<div class="tab-pane fade" id="test" role="tabpanel">
	<div class="container" id="frame">
		<div id="hi" v-html="html"></div>
		<button class="btn btn-primary" v-on:click="hello">Fetch</button>
	</div>
</div>
It has a click handler referring to a "hello" method, and a div that is waiting to receive content. We can attach the button to the "hi" container like this:
<script type="module">
	import Vue from 'vue';

	const HelloHandling = {
		data: {
			html: ''
		},
		methods: {
			hello() {
				const handler = this;
				fetch("/test").then(response => {
					response.text().then(data => {
						handler.html = data;
					});
				});
			},
		}
	}

	new Vue(HelloHandling).$mount("#test");
</script>
To make it work we just need to remove the <turbo-frame/> elements from the server side template (reverting to what we had in the HTMX sample).
It is definitely possible to replace our Turbo (and HTMX) code with Vue (or another library or even plain Javscript), but we can see from the sample that it inevitably involves some boilerplate Javascript.

VMware offers training and certification to turbo-charge your progress.
Learn moreTanzu Spring offers support and binaries for OpenJDK™, Spring, and Apache Tomcat® in one simple subscription.
Learn moreCheck out all the upcoming events in the Spring community.
View all